2. Getting to know your CMS
Now that you’ve created an account for your site’s CMS and know how to get back in to it anytime, let’s get to know the interface itself.

Let’s start with the two tabs on the left, Pages and Collections. These are your CMS’s two default tabs. You’ll be able to open more tabs, as you’ll see later, but these two will always be there for you.
Pages tab
The Pages tab, as you might imagine, contains a list of your site’s pages. It’ll be divided into at least two sections, but probably more:
- Static pages: these are pages I built outside of your Collections. These may include your homepage, About page, Services/Products, Contact, etc.
- Collection pages: these are pages generated from your Collections, and can include things like a blog, help center, documentation, and more. These are listed with their Collection name, like so: Blog Pages.

What you can do in the Pages tab
The Pages tab allows you to do several things:
- Search for a page by name: Type a page’s name into the search bar to find it. Note that this is exact-match search, and it only searches the page’s name, so you’ll need to enter a word or words that appear in the page’s name exactly.
- Go to a page: Just click the page name in the list to collapse the Pages tab and view the page. Once you’re there, you can add and edit content to your website just like writing in a text editor.
- Manage page settings: When you hover your cursor over a page in the list, you’ll see a button labeled “Settings” appear. There, you can manage vital page settings like SEO meta title and description, Open Graph title and description, and Open Graph image.
Managing page settings
Because these page settings are so important for search and social, let’s dig a little deeper into what each of these settings actually means, and how you can make the most of them.
SEO Settings
SEO stands for “search engine optimization.” It’s the practice of building and improving websites in order to improve their chances of being found through search engines like Google, Bing, etc.
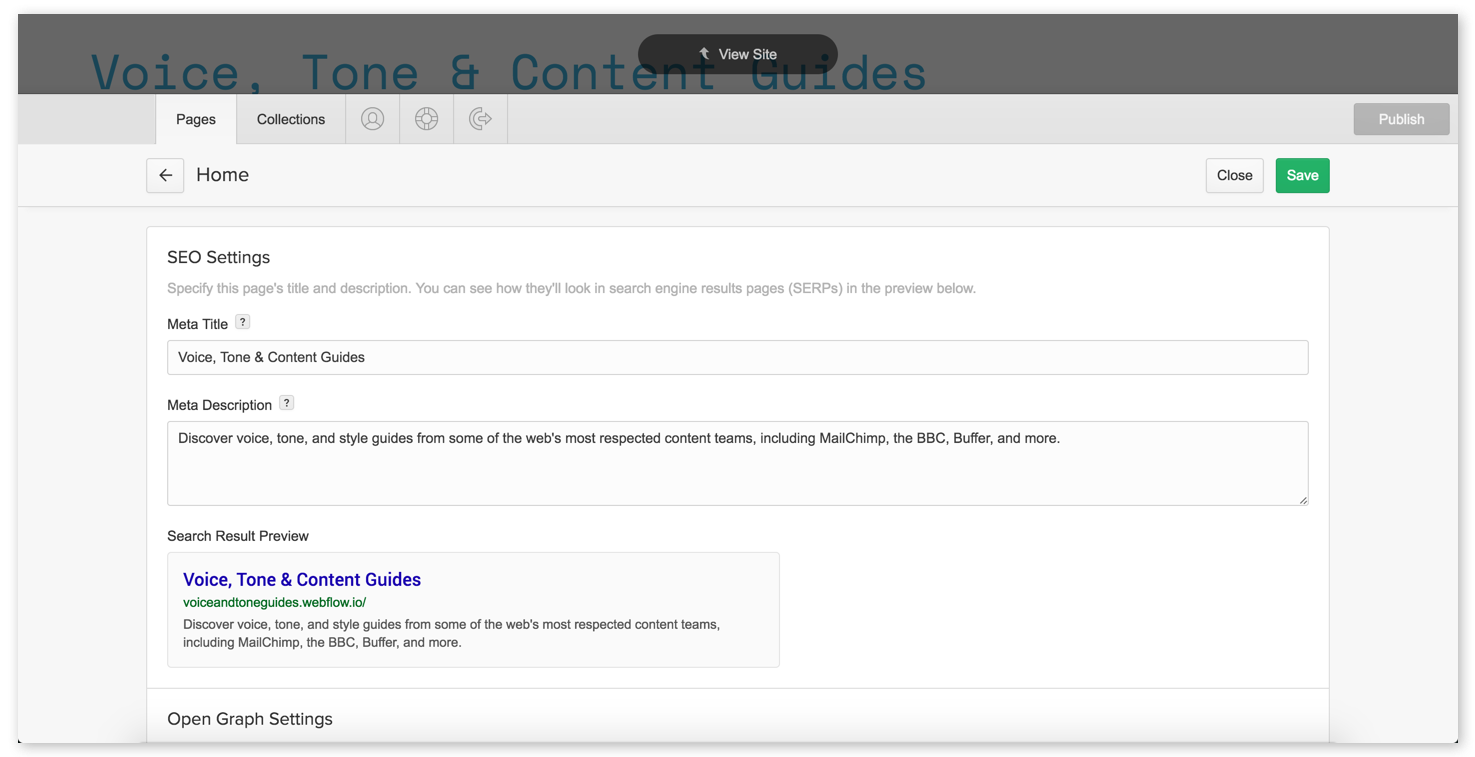
In each page’s settings, you can create and edit the following page-specific SEO settings:
- Meta title: A page’s title plays a very important role in its visibility and performance in search engines, both because it a) tells search engines what the page is about and b) is what search engine users will click on to reach your site. Be sure to include the types of words people use to describe your business in the title. Ideally, a page’s title should be about 55 to 60 characters long.
Example If I were building a website for a San Francisco Bay Area lawn care company, I’d probably title my homepage “SF Bay Area Lawn Care.” Then I might have other pages like “Berkeley Lawn Care” and “El Cerrito Lawn Care.” - Meta description: The description allows you to add a little more detail about your page (about 150 characters of it). It’s important for search, but not nearly as important as the title.
The Search Result Preview sections shows you what the content you’ve entered will look like on a Google search results page. If any of your text gets cut off in the preview, you’ll want to trim your text to fit.
Open Graph (OG) settings
Open Graph settings are very similar to SEO settings, except that they’re used by social networks like Facebook, Twitter, and LinkedIn. If you use any of these social networks, you’ve seen Open Graph at work many times.
In most cases, you can just tick the checkbox to use the same content as your SEO title and description. But feel free to customize it, if you’d like.
Open Graph also allows you to specify an image to be displayed along with your title and description.

Collections tab
The Collections tab is very similar to the Pages tab, but it only lists your Collection content — the stuff I created with the CMS.
When you click on a Collection, you’ll be taken to a new tab with a list of all the items in the Collection.
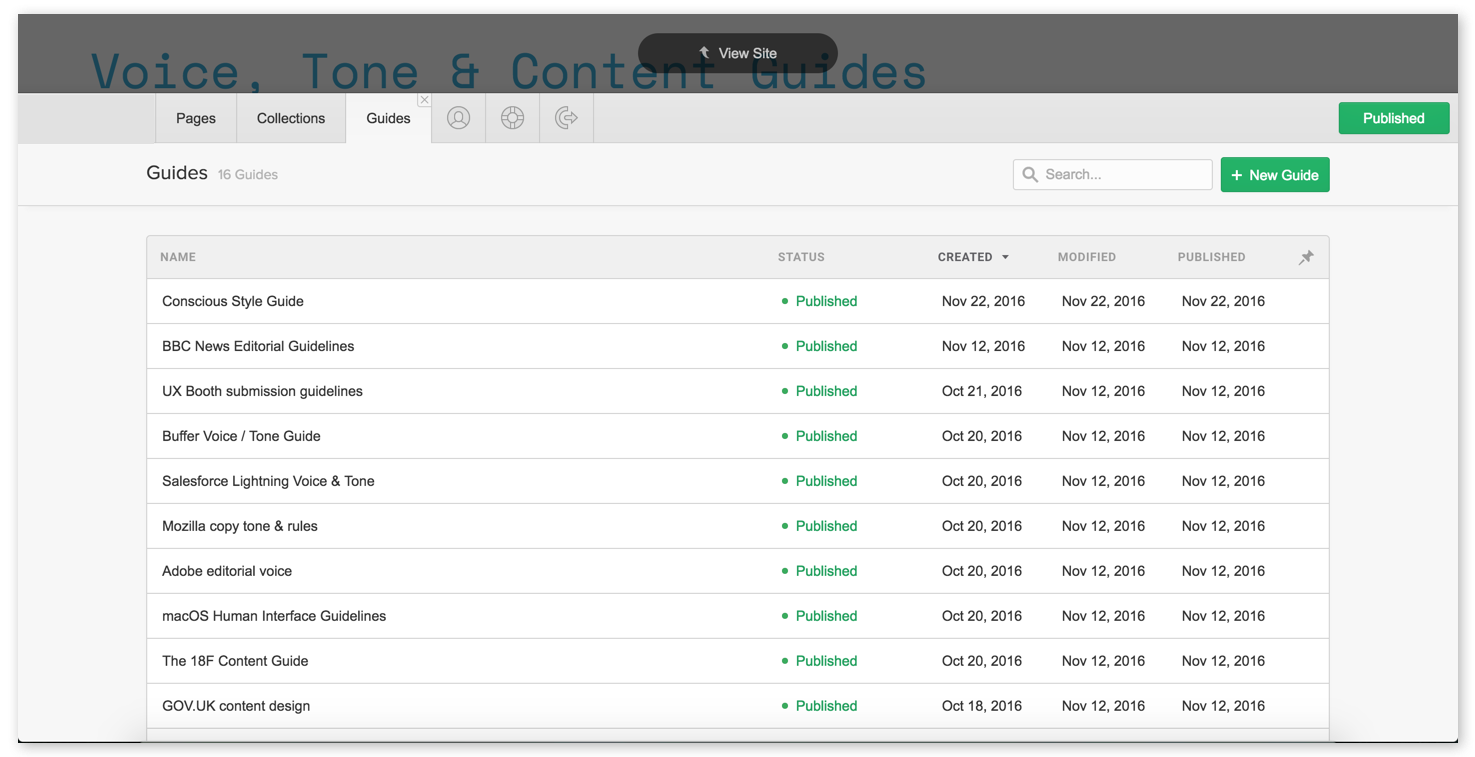
To start creating a new item within this Collection, click the + New button and fill out the item’s various fields, paying close attention to the help text and other requirements for each.
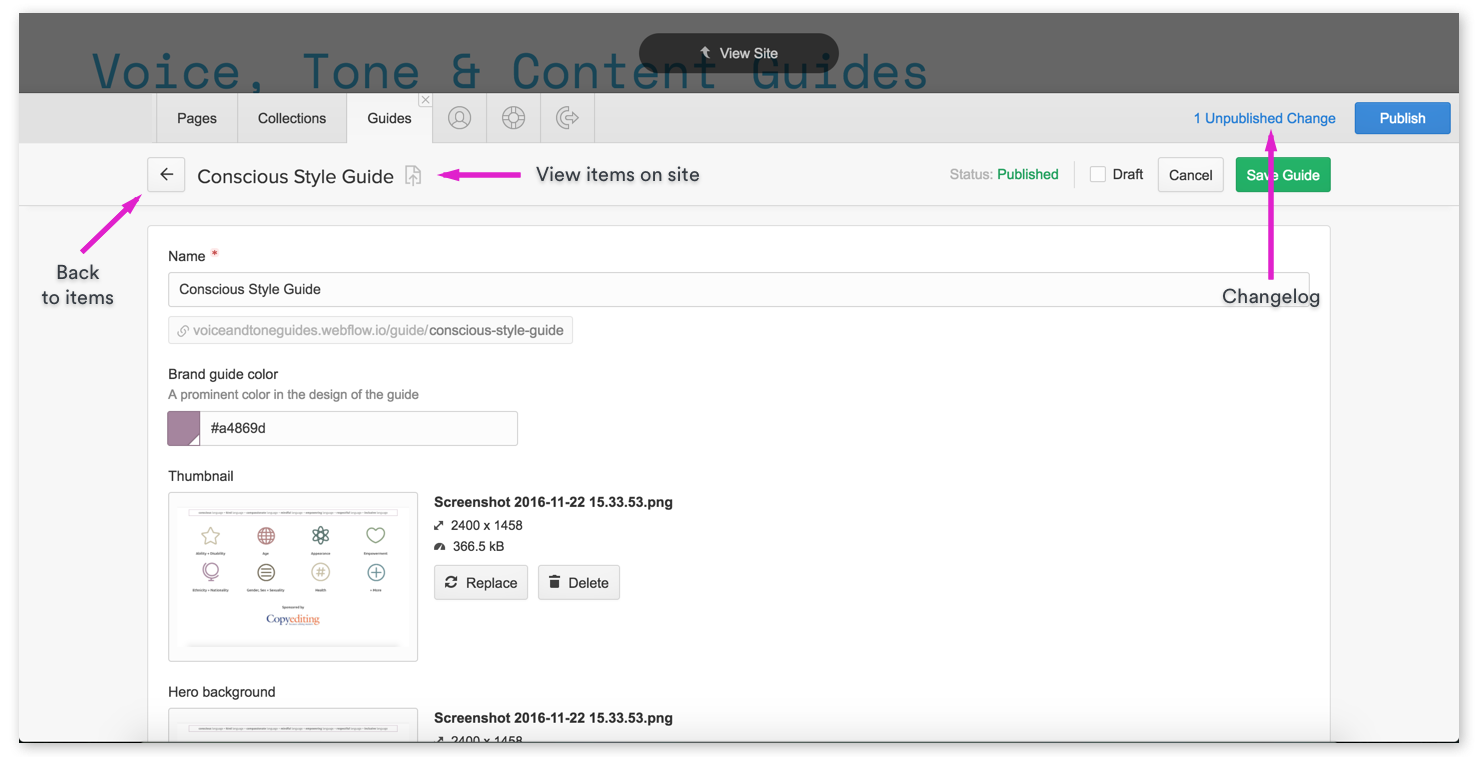
What you see within an individual Collection item will change based on the structure of the Collection it belongs to, but you’ll see several elements over and over again:
- Back button: Click this to go back to the list of items in this Collection
- View item button: This light grey button collapses the CMS to show you the item you’re currently viewing right on your live website. If you’d like, you can edit its contents there instead of in this panel.
- Status: Shows the current status of the item you’re viewing. Statuses include Published, Not Published, and Draft.
- Draft checkbox: Tick this checkbox if you aren’t finished creating or editing the current item. Anything that isn’t marked as a draft will be published when someone clicks the Publish button!
- Changelog: As you make changes within your CMS, it will record the number of items and pages you’ve changed until you click Publish. You can click on the changelog to see a list of items and pages that have unpublished changes, along with who made them, if you have fellow CMS users.
- View Site: Click this to view your website. You can use any links on your website to move between pages in this view.
The Save and Publish buttons should be fairly self-explanatory. Just note that you’ll need to click Publish twice to confirm your action.
How publishing works in your CMS
Every time you click Publish in your CMS, your whole website gets republished. If you know that others are working on the site when you're ready to publish, you may want to ask them if they're ready for their changes to go live.
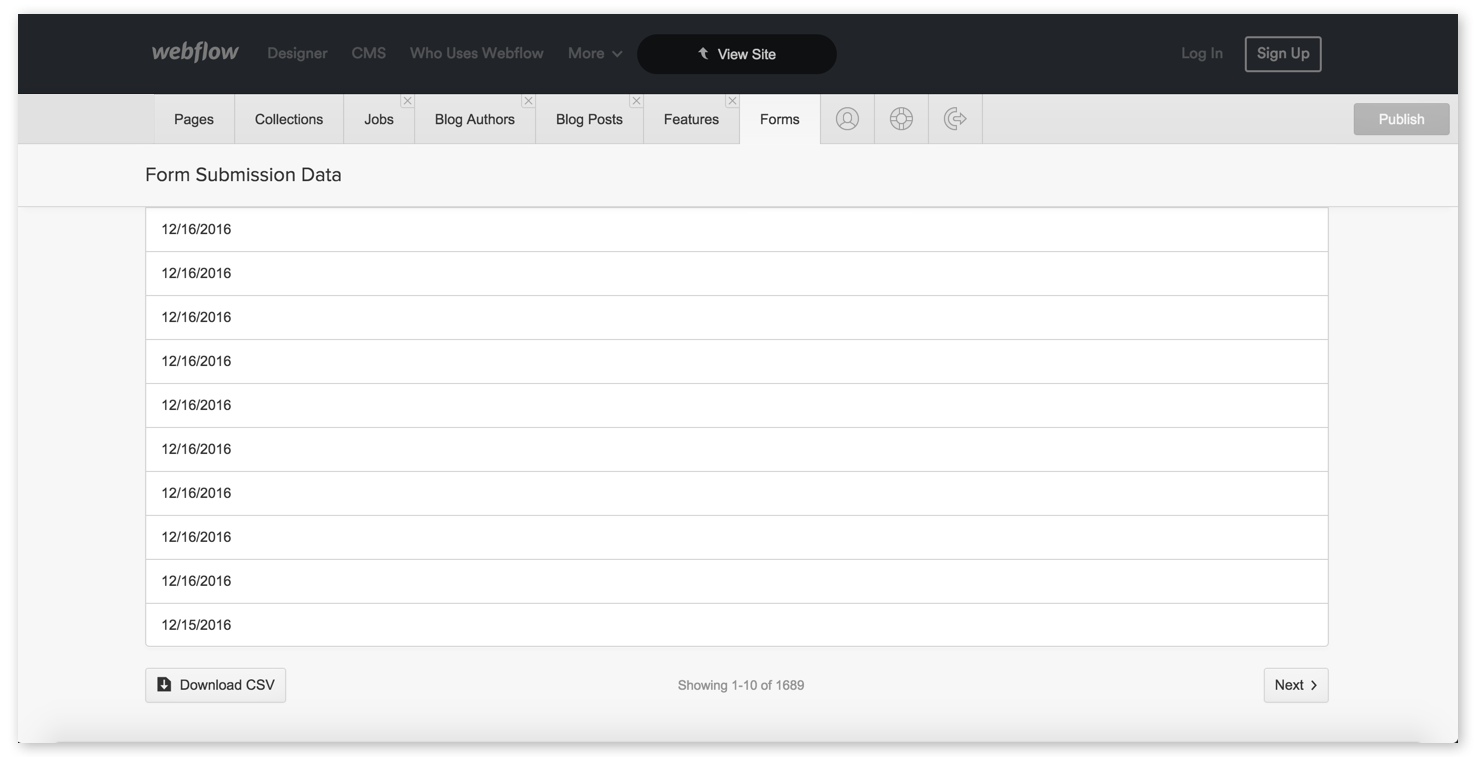
Forms tab
Your CMS may include a Forms tab. If it does, you’ll be able to view some basic information from forms people have submitted, but it’s most useful as a place for you to download the complete form data. In the downloaded CSV file (a format that works with all the major spreadsheet apps), you’ll be able to see all the submitted info.